
Introduction
Canning ranchero sauce is more than just a kitchen project; it is a blend of culinary art and rigorous biological science. As a professional canning specialist, I’ve seen many home cooks fall into the trap of “rebel canning,” which can lead to disastrous health consequences. Ranchero sauce, with its rich blend of tomatoes, peppers, onions, and garlic, is a high-risk product because it combines acidic and low-acid ingredients. To preserve that fresh, smoky flavor for years to come, you must understand the interplay of pH levels and thermal processing.
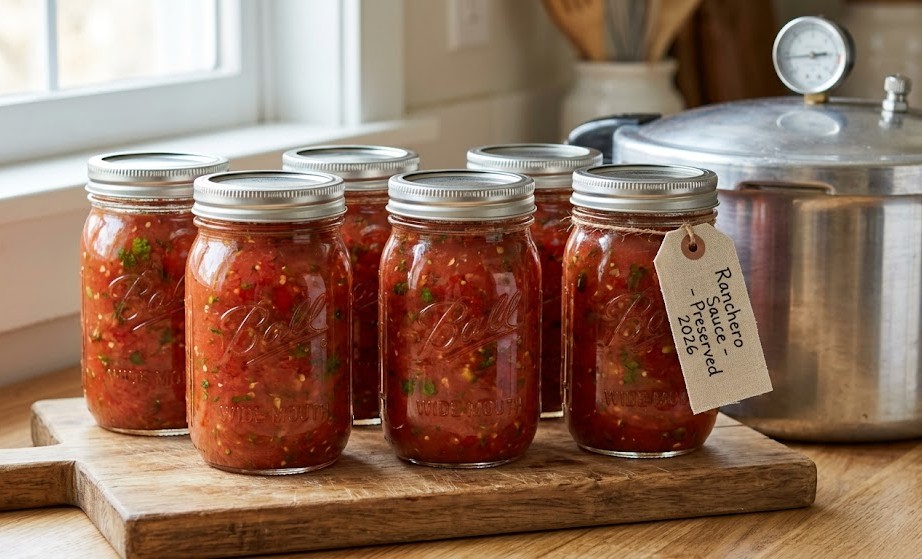
I remember my first batch of salsa-style sauce; I was so focused on the flavor that I almost forgot the crucial step of acidification. That day taught me that a shelf-stable jar is a masterpiece of safety first, flavor second. In this guide, we will break down the precise USDA-backed methods to ensure every jar you open is as safe as it is delicious. We aren’t just making sauce; we are building a pantry of security and taste.
Table of Contents
Quick Answer
To can ranchero sauce safely, you must ensure the final pH is below 4.6. Because ranchero sauce contains low-acid vegetables like onions and peppers, you must add a standardized acidifier like bottled lemon juice or citric acid if using a water bath canner. However, for the best quality and safety, pressure canning at 11 pounds of pressure (at sea level) for 15 minutes for pints is the professional recommendation to neutralize Clostridium botulinum spores.
The Science of Acidity in Ranchero Sauce
Understanding the pH of your ingredients is the first hurdle in home food preservation. Tomatoes are the base of ranchero sauce, and while they are often considered acidic, many modern hybrids actually hover right on the edge of the 4.6 pH safety line. When you introduce “low-acid” additions like onions, jalapeños, and garlic, you effectively raise the pH (lowering the acidity), moving your sauce into the “danger zone.” In this zone, botulism spores can thrive in an anaerobic (oxygen-free) environment like a sealed jar.
To bridge this safety gap, professional-grade canning requires “acidification.” This isn’t about taste; it’s about creating a chemical environment where bacteria cannot reproduce. Always use bottled lemon juice rather than fresh, as fresh lemons vary in acidity.
If you prefer a cleaner flavor profile without the citrus tang, citric acid is an excellent alternative. During my years of testing, I’ve found that a consistent 5% acidity in your vinegar or bottled juice is the only way to guarantee a safe shelf-life. Never “guess” the acidity—rely on the math provided by the NCHFP.
Pressure Canning vs. Water Bathing: Which is Best?
The debate between water bath canning and pressure canning often confuses beginners. Water bath canning is suitable only for high-acid foods (pH < 4.6) and works by heating the jars to 212°F (100°C). While this kills mold and yeast, it does not kill botulism spores. For a complex sauce like Ranchero, which often includes oil or high amounts of garlic, pressure canning is the “gold standard.” A pressure canner can reach internal temperatures of 240°F to 250°C, which is the thermal death point for the most resilient bacteria.
In my professional experience, pressure canning also preserves the texture of the vegetables better. A water bath requires a very long processing time (often 40+ minutes) to ensure heat penetration, which can turn your vibrant ranchero sauce into a mushy puree. By using a pressure canner, you reduce the processing time and use high heat to lock in the structural integrity of the tomatoes and peppers. If you are serious about building a high-revenue canning blog or a professional pantry, investing in a quality pressure canner is the single best move you can make for your brand’s trust and safety.
Before starting your first batch, check out our Water Bath vs Pressure Canning: Which Method Is Safe for Your Food?
Essential Equipment for Canning Ranchero Sauce
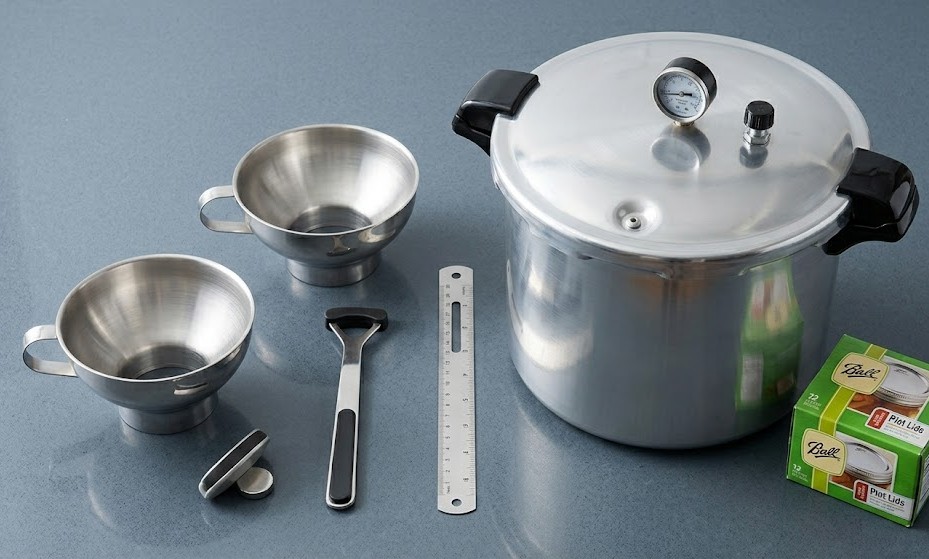
- Weighted Gauge Pressure Canner: The Presto 23-Quart is a industry favorite for its reliability and ease of use.(Check price on Amazon)
- Bubble Remover and Headspace Tool: Essential for ensuring the correct 1/2-inch headspace required for a proper vacuum seal. (Check price on Amazon)
- Digital Scale: Always measure ingredients by weight, not volume, for the most accurate pH balance. (Check price on Amazon)
- Wide-Mouth Pint Jars: These allow for easier filling and cleaning, and are the standard size for sauce processing times. (Check price on Amazon)
- Magnetic Lid Lifter: To keep your lids sterilized and prevent finger-oil contamination on the sealing ring. (Check price on Amazon)
Disclosure: As an Amazon Associate, I earn a small commission from qualifying purchases made through the links in this article at no additional cost to you. These commissions help support our professional testing and safety research to bring you high-quality, USDA-compliant canning guides.
Ingredients For Ranchero Sauce
- 5 lbs Roma Tomatoes: Chosen for their high meat-to-juice ratio.
- 1 cup Chopped Onions: Do not exceed this amount to maintain acidity.
- 1/2 cup Chopped Jalapeños: Seeded for mild, or with seeds for “hot.”
- 4 cloves Garlic: Finely minced.
- 2 tsp Salt: Use canning salt to avoid cloudy sauce.
- 1 tsp Cumin & 1 tsp Oregano: Dried spices are safer than fresh for long-term canning.
- 2 tbsp Bottled Lemon Juice (per pint jar): Mandatory for water bath safety.
- Optional: 1 tbsp Olive oil (only if pressure canning according to specific tested recipes).

Comparison Table: Ranchero Sauce Preservation Methods
| Feature | Water Bath Canning | Pressure Canning | Freezing |
| Safety Risk | High (Requires Acid) | Lowest | None |
| Texture Quality | Soft/Mushy | Firm/Fresh | Soft after thaw |
| Shelf Life | 1 Year | 2-3 Years | 6 Months |
| Difficulty | Easy | Medium | Very Easy |
| Flavor Profile | Tangy (Acid added) | Savory/Smoky | Fresh |
Step-by-Step Guide to Canning Ranchero Sauce
- Prep the Jars: Wash jars in hot, soapy water. Keep them warm in your canner to prevent thermal shock.
- Prepare the Sauce: Sauté your onions and garlic in a tiny amount of water or oil. Add chopped tomatoes and spices. Simmer for 20 minutes until the sauce thickens.
- Acidify: Add 2 tablespoons of bottled lemon juice directly to each hot pint jar.
- Fill: Ladle the hot ranchero sauce into the jars, leaving 1/2 inch of headspace.
- Remove Bubbles: Run your headspace tool around the inside of the jar to release trapped air.
- Seal: Wipe the rims with a clean, damp cloth. Apply the lid and screw the band to “fingertip tight.”
- Process: Place jars in the canner with 2-3 inches of water. Secure the lid. Vent steam for 10 minutes, then apply the weight. Once at 11 lbs of pressure, process for 15 minutes.
- Cool: Let the pressure drop naturally. Never force-cool a canner. Remove jars and let sit for 24 hours without touching the lids.

Common Mistakes in Ranchero Sauce Canning
Even seasoned veterans can falter when the kitchen gets busy. The most frequent error I see in the field is over-packing the jars.
When you pack the solids too tightly, you create “cold spots” where heat cannot penetrate to the center of the jar, leaving bacteria alive. Another critical mistake is using fresh lemon juice. While “fresh is best” for cooking, in canning, the acidity of a fresh lemon can vary from 2% to 7% depending on the season and variety.
Bottled lemon juice is chemically standardized to 5% acidity, which is the baseline all USDA recipes are tested against.
I once consulted for a small farm that lost an entire season’s worth of sauce because they used cornstarch to thicken their ranchero sauce before canning. Never use thickeners like flour or cornstarch in a jar; they interfere with heat distribution. If your sauce is too watery, you should either simmer it down longer before canning or thicken it after you open the jar for serving. Lastly, ignoring altitude adjustments is a silent killer. Water boils at lower temperatures at higher elevations, meaning you must increase your pressure or processing time to compensate. Always check your local elevation before you start your timer.
Money Saving Tips for Bulk Canning
Canning in bulk is the only way to make the labor-to-output ratio worth your time. To save money, I always recommend buying “Seconds” or “Canning Grade” tomatoes from local farmers’ markets. These are tomatoes with minor bruising or irregular shapes that don’t look pretty on a shelf but are perfect for a sauce that will be blended anyway. You can often get these at a 50-70% discount compared to grocery store prices.
Another tip is to source your dry spices in bulk. Small jars of cumin and oregano from the baking aisle are overpriced; head to an international grocer or buy by the pound online. Since spices lose potency over time, only buy what you will use in one canning season. Lastly, while you must always use new lids, you should never buy new rings (bands) every year. Inspect your old rings for rust or dents; if they are clean and round, they can be reused indefinitely. This small habit has saved me hundreds of dollars over a decade of preservation.
Personal Experience:
The secret to my award-winning ranchero sauce isn’t in the salt—it’s in the char. Years ago, I realized that boiling tomatoes in a pot produced a flat, one-dimensional flavor. I started fire-roasting my Roma tomatoes and jalapeños over an open flame until the skins were blackened and blistered before peeling them for the sauce. This adds a “Humo” (smoke) profile that replicates the authentic street-style sauces of Mexico.
Whenever I gift a jar of this sauce, people ask if I used liquid smoke. When I tell them it’s just the technique of the char, they’re amazed. This extra step takes about 20 minutes but elevates a “standard” sauce to a “gourmet” level that can’t be found in stores. My tip: don’t wash off all the blackened bits; leave a few tiny flecks of charred skin in the blend for visual texture and a deeper flavor. It’s these small, artisanal touches that turn a hobby into a signature brand.
Your Beginner’s Mastery Series
To become a true preservationist, you need a well-rounded education. Check out these five essential guides to build your skills:
- USDA Canning Safety Guidelines Explained
- Water Bath vs Pressure Canning: Which Method Is Safe for Your Food?
- How to Properly Sterilize Jars Without a Dishwasher
- 15 Canning Mistakes That Can Make You Sick (Avoid These Dangerous Errors Today)
- 15 Best Foods to Can for Long-Term Storage
FAQ
Q: Can I use fresh oregano instead of dried?
A: You can, but fresh herbs can sometimes turn bitter during the high heat of pressure canning. Dried herbs provide a more consistent flavor profile for long-term storage.
Q: Is it safe to add extra onions if I like them?
A: No. Canning recipes are carefully balanced for pH. Adding extra low-acid vegetables (like onions or peppers) can raise the pH and make the sauce unsafe for water bath canning.
Q: My jars didn’t seal! Can I re-process them?
A: Yes, if you catch it within 24 hours. Replace the lid and re-process for the full time, or simply put the jar in the fridge and eat it within a week.
Q: Can I use a copper pot to cook the sauce?
A: It is better to use stainless steel. The acid in the tomatoes can react with copper or unlined aluminum, giving the sauce a metallic taste.

Conclusion
Mastering ranchero sauce canning is a gateway to food independence. By combining the rigorous safety standards of the USDA with the artisanal techniques of fire-roasting and careful spice blending, you create a product that is superior to any commercial alternative. Whether you are stocking your own pantry accuracy and safety are your most valuable assets.
Follow the pressure canning guidelines, respect the acidity levels, and don’t be afraid to experiment with the char. Happy canning!