
Introduction
One small mistake in canning doesn’t always show up right away—but it can silently ruin your food. Water bath vs pressure canning is one of the most important decisions in safe home food preservation.
I learned this the hard way when I almost processed low-acid vegetables using a water bath method. At the time, it felt “good enough.” Later, after studying USDA guidelines, I realized that mistake could have made the food unsafe.
That moment changed how I approach canning forever.
This guide isn’t just another overview—it’s a complete, safety-first breakdown based on trusted sources like the USDA and National Center for Home Food Preservation.
By the end, you’ll know exactly
Table of Contents
Understanding water bath vs pressure canning helps you avoid serious mistakes.
The 10-Second Safety Rule Every Canner Should Know
Before you even choose a method, ask yourself one simple question:
👉 “Is this food high-acid or low-acid?”
If you don’t know the answer within 10 seconds — stop and check first.
Because this one decision determines everything:
- Your method
- Your safety
- Your final result
💡 Real tip: I keep a small printed acid-level chart in my kitchen—saves time and prevents risky guesses.
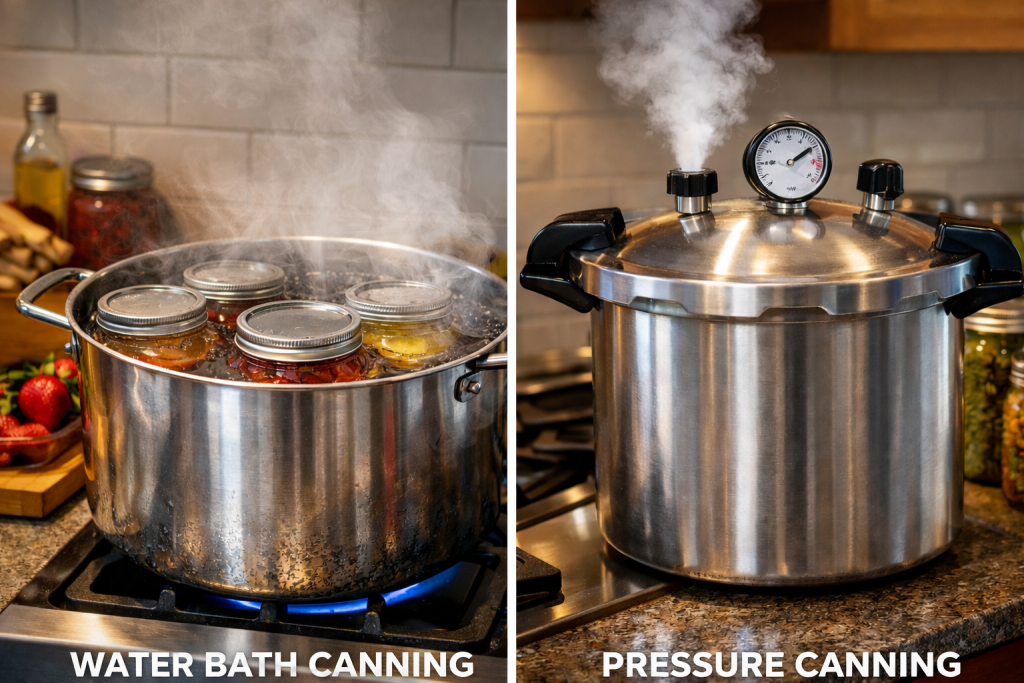
Quick Answer
- Water Bath Canning → For high-acid foods like fruits, jams, and pickles
- Pressure Canning → For low-acid foods like vegetables, meat, and soups
👉 The difference is about temperature and safety, not preference.
Water bath reaches boiling temperature (212°F), while pressure canning reaches higher temperatures needed to safely preserve low-acid foods.
💡 Quick tip: When in doubt, always check acidity first—not the recipe.
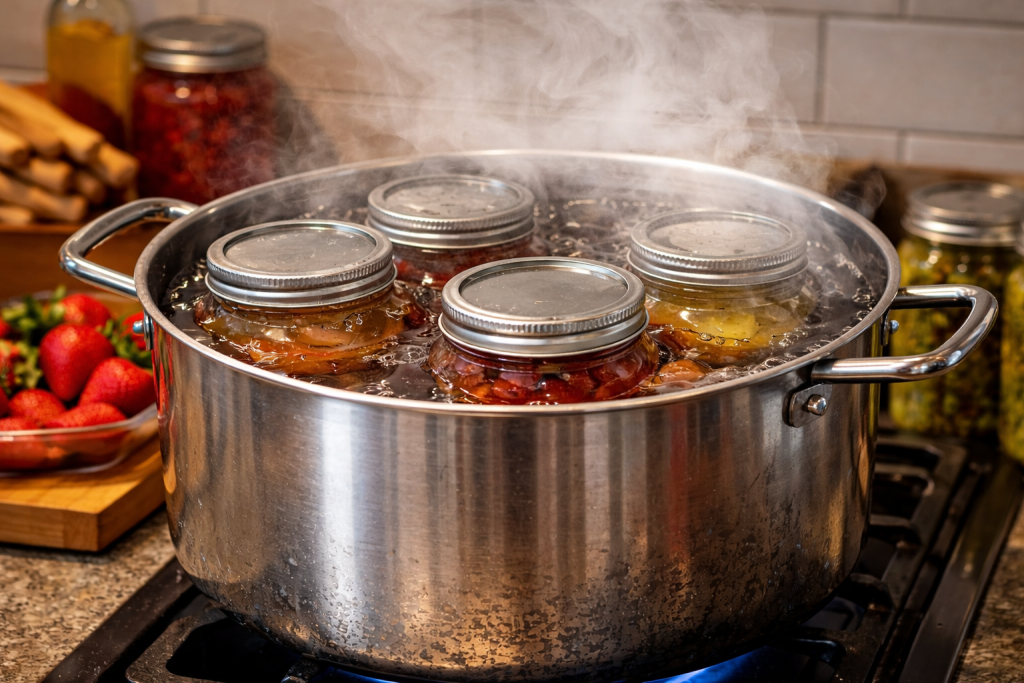
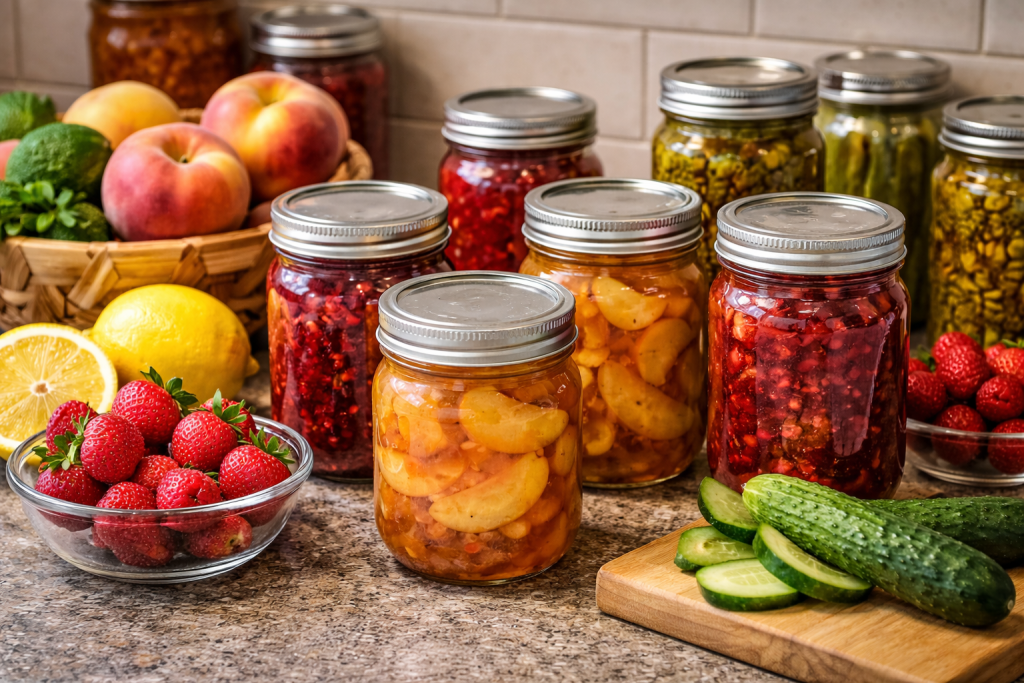
What is Water Bath Canning?
Water bath canning is the most beginner-friendly preservation method. It involves placing sealed jars in boiling water for a specific time.
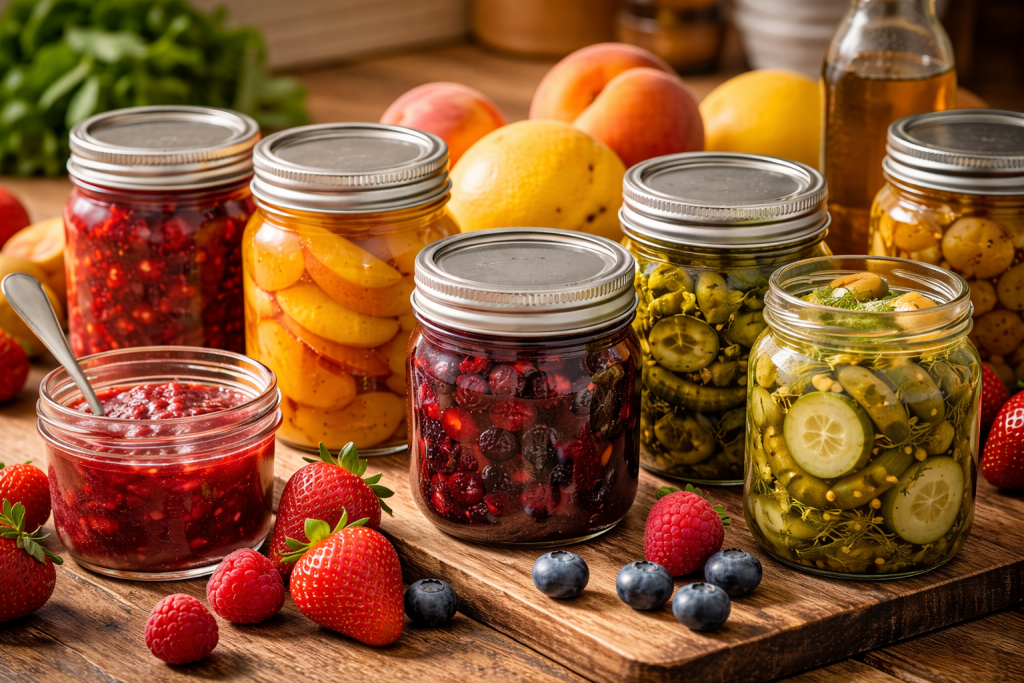
Best Foods for Water Bath:
- Fruits (berries, peaches, apples)
- Jams & jellies
- Pickles
- Tomatoes (with added acid)
Why It Works:
High-acid foods naturally prevent harmful bacteria growth, so boiling water is enough to make them shelf-stable.
💡 My experience: Most beginners gain confidence quickly with jams—it’s forgiving and gives fast success.
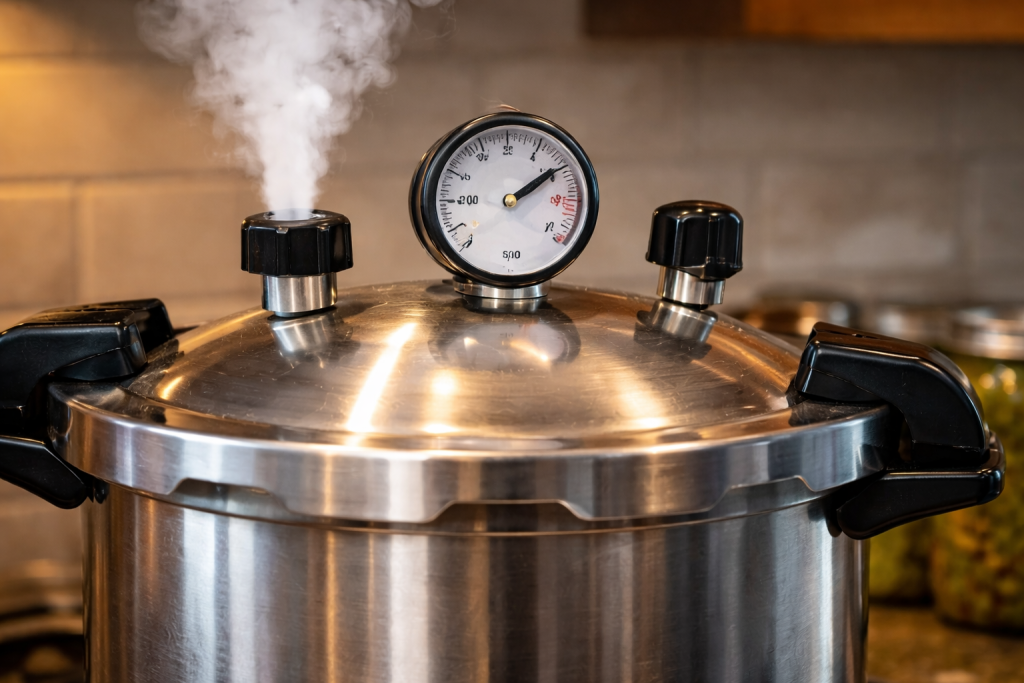
What is Pressure Canning?
Pressure canning uses a sealed environment to reach temperatures above boiling—something water alone cannot do.
Best Foods for Pressure Canning:
- Vegetables (green beans, carrots, corn)
- Meat, poultry
- Seafood
- Soups and broths
Why It Matters:
Low-acid foods can support dangerous bacteria. Only high heat (240°F+) can neutralize the risk.
💡 Real insight: The first time using a pressure canner feels intimidating—but once you understand pressure control, it becomes predictable and safe.
Based on guidelines from the USDA, safe canning depends on proper temperature and processing time.
Water Bath vs Pressure Canning: Key Differences You Must Understand
| Feature | Water Bath | Pressure Canning |
|---|---|---|
| Temperature | 212°F | 240–250°F |
| Food Type | High-acid | Low-acid |
| Equipment | Simple pot | Pressure canner |
| Risk if Wrong | Low | High |
| Skill Level | Beginner | Intermediate |
| Processing Time | Short | Moderate–Long |
💡 Important mindset: This isn’t about convenience—it’s about using the correct method for the correct food.
Real-Life Example: Choosing the Right Method
Let’s make this practical:
Scenario 1: Making Strawberry Jam
✔ Water bath canning works perfectly
Scenario 2: Preserving Green Beans
✔ Must use pressure canning
Scenario 3: Tomato Sauce
✔ Water bath (only with added acid)
💡 Quick insight: When I started thinking in “food type scenarios,” I stopped making mistakes.
Why Using the Wrong Method Is Not Worth the Risk
Here’s the reality most beginners don’t hear:
Low-acid foods processed incorrectly can develop harmful toxins that:
- Have no smell
- Have no visible signs
- Cannot be destroyed by reheating
That’s why trusted guidelines emphasize method accuracy over convenience.
💡 Lesson learned: If a recipe feels “shortcut-friendly,” double-check it—it usually isn’t safe.
For detailed home preservation methods, refer to the National Center for Home Food Preservation.
Essential Equipment The Biggest Myth That Ruins Canning Results
Many beginners think:
👉 “If I boil it longer, it will be safe.”
This is not true.
Boiling water cannot reach the temperature needed for low-acid foods—no matter how long you process.
💡 Lesson learned: Time does not replace temperature in canning. Understanding this changed everything for me.
Instead of buying everything blindly, here’s how I recommend choosing:
Core Tools:
- Water bath canner (or deep pot with rack)
- Pressure canner (dial or weighted gauge)
- Mason jars (approved for canning)
- New lids + reusable bands
- Jar lifter & funnel
Smart Buying Tips:
- Beginners → Start with water bath setup
- Serious preservers → Invest in a quality pressure canner
- Avoid → Regular pressure cookers (not designed for safe canning)
💡 Money-saving tip: I still use jars from years ago—just replace lids each time.
Best Canning Equipment
If you’re planning to can regularly, choosing the right equipment early saves both money and frustration.
Beginner-Friendly Setup
- Basic water bath canner
- Starter jar kit
👉 Best for: Jams, fruits, pickles
Intermediate Upgrade
- Entry-level pressure canner
👉 Best for: Vegetables and mixed foods
Long-Term Investment
- Heavy-duty pressure canner (large capacity)
👉 Best for: Bulk canning & serious preservers
💡 My experience: I started cheap, but upgrading later actually cost more—buy smart if you’re serious.
Step-by-Step Guide
Water Bath Method
- Prepare clean jars
- Fill with hot food
- Remove air bubbles
- Seal lids
- Submerge fully in boiling water
- Process (10–30 minutes depending on recipe)
- Let cool (listen for lid “pop”)
Pressure Canning Method
- Add water to canner
- Load filled jars
- Lock lid
- Vent steam for 10 minutes
- Build pressure
- Process (20–100 minutes depending on food)
- Let pressure drop naturally
- Cool and check seals
💡 Critical tip: Never rush cooling—this is where most seal failures happen.
Common Mistakes To Avoid
- ❌ Using water bath for vegetables → Unsafe preservation
- ❌ Ignoring altitude adjustments → Under-processing
- ❌ Overfilling jars → Seal failure
- ❌ Reusing lids → Weak seal
- ❌ Skipping timing → Inconsistent results
💡 My mistake once: I overpacked jars to “save space”—ended up with failed seals and wasted food.
For detailed article about Avoid 10 Common Canning Mistakes
Pro Tips Most Guides Don’t Tell You
- Always preheat jars — prevents cracking
- Don’t rush cooling — improves seal success
- Label everything with date — avoids confusion
- Keep notes of each batch — helps improve over time
💡 My routine: I track every batch in a notebook—small habit, big improvement in consistency.
Money-Saving Strategies That Actually Work
- Buy produce in peak season (cheapest + freshest)
- Can in batches (saves gas/time)
- Reuse jars properly
- Grow easy crops (tomatoes, cucumbers)
💡 Real saving: Bulk canning summer produce cut my yearly grocery cost noticeably.
Personal Experience
When I first started, I treated canning like cooking—flexible and forgiving.
That mindset was wrong.
Canning is precise. Once I followed tested guidelines strictly, everything improved:
- Better seals
- Longer shelf life
- More confidence
Now, I don’t guess—I follow proven methods every time.
If you’re Building Your Canning Knowledge
👉 Start here:
- Beginner’s Guide to Home Canning (step-by-step basics)
- Beginner’s Guide to Pressure Canning
- 10 Common Canning Mistakes
- 15 Canning Mistakes That Can Make You Sick
- USDA Canning Safety Guidelines Explained
💡 Tip: Follow this order—it builds skill without overwhelm.
FAQ
Can I skip pressure canning if I boil longer?
No. Boiling longer does not replace pressure canning.
Can I mix both methods?
No. Each food requires a specific method.
Why did my jar not seal?
Most common reasons:
- Dirty rim
- Incorrect timing
- Lid issue
Is pressure canning dangerous?
Modern canners are very safe when used correctly.
How do I know if canned food is safe?
Check:
- Lid sealed
- No bulging
- No unusual smell
Conclusion
Water bath vs pressure canning isn’t a choice—it’s a rule.
- High-acid → Water bath
- Low-acid → Pressure canning
Once you understand this, everything becomes simpler, safer, and more reliable.
Once you understand water bath vs pressure canning, preserving food becomes much safer
💡 Final thought: The goal isn’t just preserving food—it’s preserving it the right way.
Pingback: Canning Ranchero Sauce 7 Critical Safety Rules: USDA Guide 2026